
This blog explains how you can upload your projects on GitHub, create repositories, use Git features, and deploy your website. We’ve also covered the 3 common methods of uploading files and folders with appropriate commands and practices.
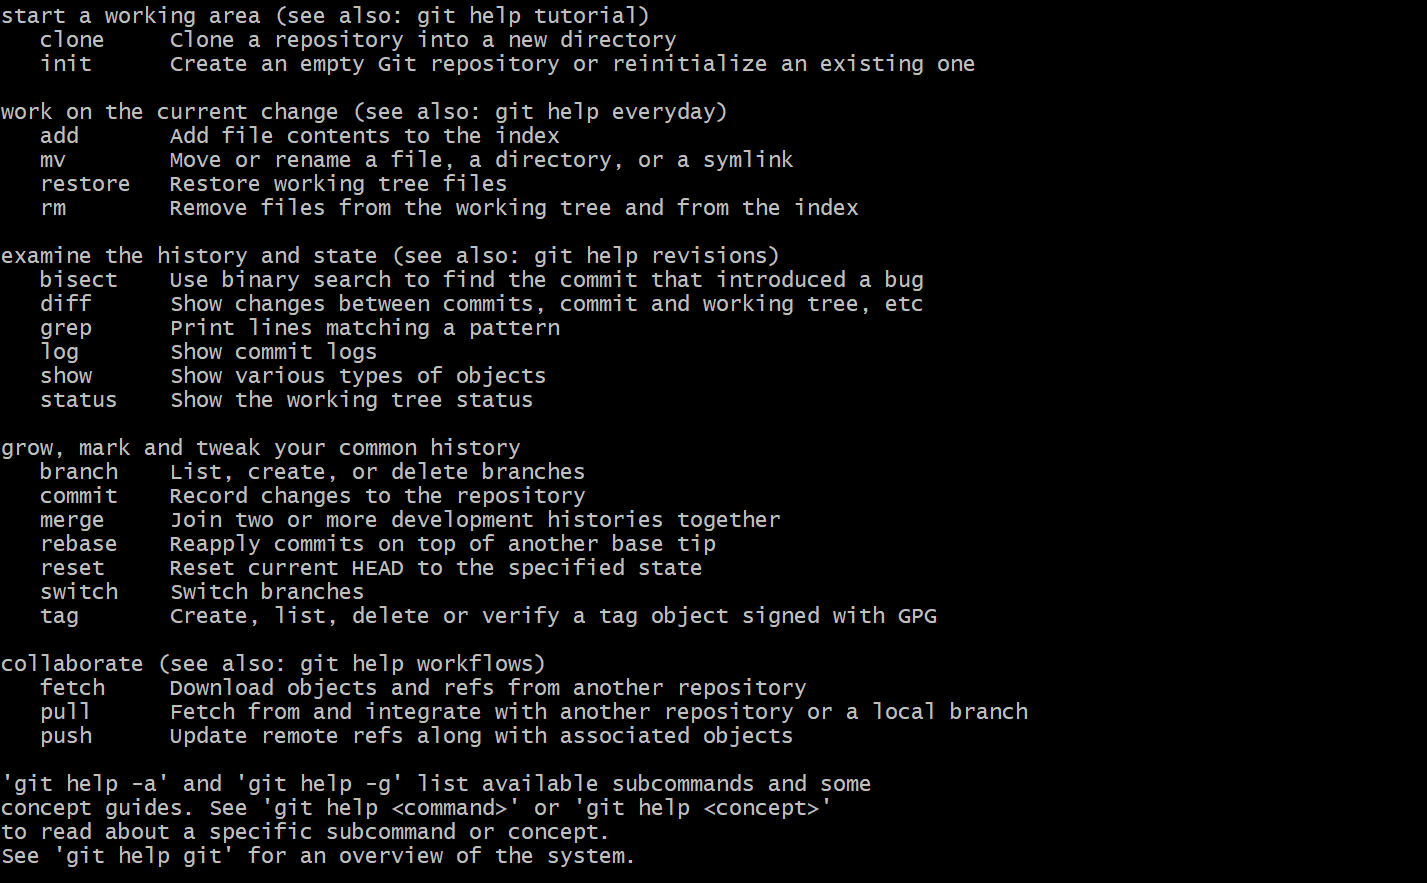
Introduction to GitHub
GitHub is a web-based platform for version control using Git. It was launched in 2008 by Tom Preston-Werner, Chris Wanstrath, PJ Hyett, and Scott Chacon. GitHub allows developers to collaborate, store code, track changes, and deploy static websites easily.
Key Features of GitHub
- Version control using Git
- Open-source collaboration
- Public and private repositories
- Issue tracking and pull requests
- Free hosting for static websites via GitHub Pages
Limitations
- Private repos have limited features on free plans
- Not suitable for large binary files
How to Set Up GitHub on Your Desktop or Laptop
- Install Git for Windows/macOS/Linux.
- Download and install GitHub Desktop (optional but useful for beginners).
- Create a GitHub account at github.com.
- Configure Git with your account:
git config --global user.name "Your Name"
git config --global user.email "your@email.com"
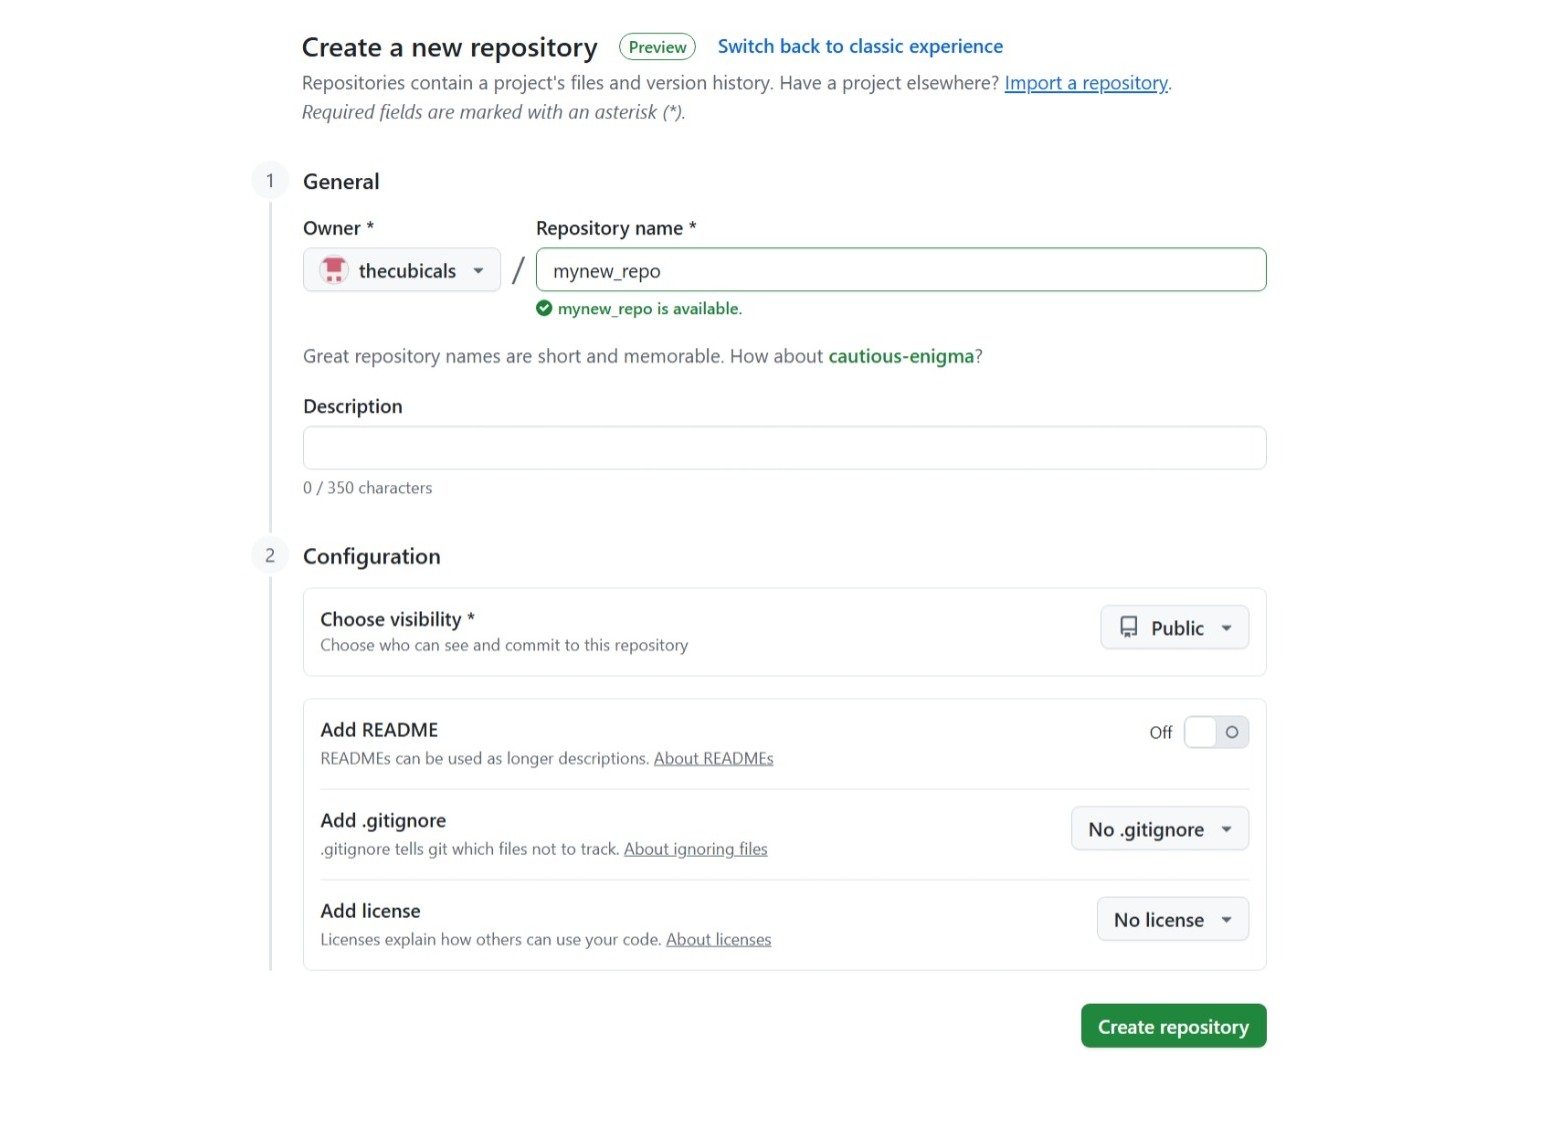
How to Create a Repository
Follow these steps to create a new GitHub repository:
- Login to your GitHub account.
- Click on New or + Create Repository.
- Fill in:
- Repository Name – A short name for your project.
- Description – (Optional) What your project does.
- Visibility – Choose public or private.
- Initialize with README – Tick this only if you are not using Git in local first.
- Click on Create repository.
When to Add README.md File?
If you are working directly on GitHub (no local Git), create README.md at the beginning.
If using Git locally and planning to push code manually, leave it unchecked to avoid merge conflicts.
How to Upload Files and Folders to GitHub
You can upload your projects using three major methods:
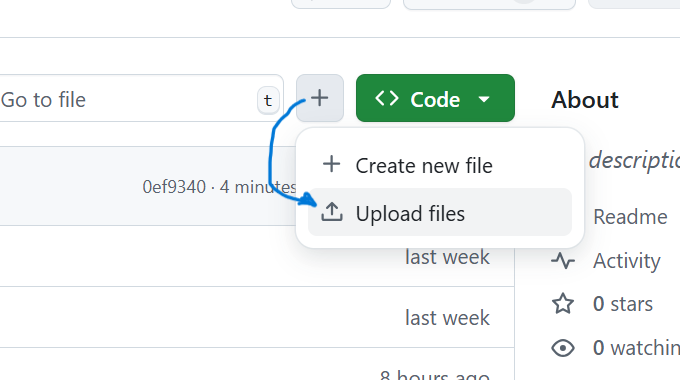
1. Upload via GitHub Web Interface
- Click on your repo → “Add file” → “Upload files”
- Drag and drop files (folders not supported)
- Ideal for small scripts or pages
2. Upload via Git Commands (Using Local Git)
This is the most flexible method. Steps:
- Create your project locally
- Use
.gitignoreto skip unnecessary files - Open terminal/command prompt
- Run these commands:
git init
git remote add origin https://github.com/username/repo-name.git
git add .
git commit -m "Initial commit"
git push -u origin main
Note: If you had created a README file while creating the repo on GitHub, run git pull origin main before pushing code to avoid conflicts.
3. Upload via Git Clone (Working on a Second System)
If you're working on another device or want to make changes to an existing repo:
git clone https://github.com/username/repo-name.gitMake changes → git add . → git commit -m "..." → git push origin main
How to Deploy a Web Page on GitHub
- Push your HTML/CSS/JS files to a public repo
- Go to Settings → Pages
- Select the branch (main) and folder (root or /docs)
- Save and your website will be live at:
https://username.github.io/repo-name/

This guide is crafted by The Cubicals to help students, developers, and learners make the most of GitHub for project uploads and website deployment.


Discussion
0 comments
No comments yet. Be the first to share your thoughts!